JWT Validation Action for Auth0
The JWT Validation action can be configured to validate tokens issued from Auth0.
This is an example Traffic Policy configuration for setting up a new API and Machine to Machine application in Auth0.
- YAML
- JSON
enabled: true
inbound:
  - expressions: []
    name: JWT Validation
    actions:
      - type: jwt-validation
        config:
          issuer:
            allow_list:
              - value: https://dev-tenant-id.us.auth0.com/
          audience:
            allow_list:
              - value: https://dev-tenant-id.us.auth0.com/api/v2/
          http:
            tokens:
              - type: jwt
                method: header
                name: Authorization
                prefix: "Bearer "
          jws:
            allowed_algorithms:
              - RS256
            keys:
              sources:
                additional_jkus:
                  - https://dev-tenant-id.us.auth0.com/.well-known/jwks.json
outbound: []
{
  "enabled": true,
  "inbound": [
    {
      "expressions": [],
      "name": "JWT Validation",
      "actions": [
        {
          "type": "jwt-validation",
          "config": {
            "issuer": {
              "allow_list": [
                {
                  "value": "https://dev-tenant-id.us.auth0.com/"
                }
              ]
            },
            "audience": {
              "allow_list": [
                {
                  "value": "https://dev-tenant-id.us.auth0.com/api/v2/"
                }
              ]
            },
            "http": {
              "tokens": [
                {
                  "type": "jwt",
                  "method": "header",
                  "name": "Authorization",
                  "prefix": "Bearer "
                }
              ]
            },
            "jws": {
              "allowed_algorithms": [
                "RS256"
              ],
              "keys": {
                "sources": {
                  "additional_jkus": [
                    "https://dev-tenant-id.us.auth0.com/.well-known/jwks.json"
                  ]
                }
              }
            }
          }
        }
      ]
    }
  ],
  "outbound": []
}
0. Define your API in Auth0
You will need to create an API in Auth0. If you've already done this, skip to the next section.
Once logged into your Auth0 Tenant Dashboard, select Applications > APIs, and then click + Create API.
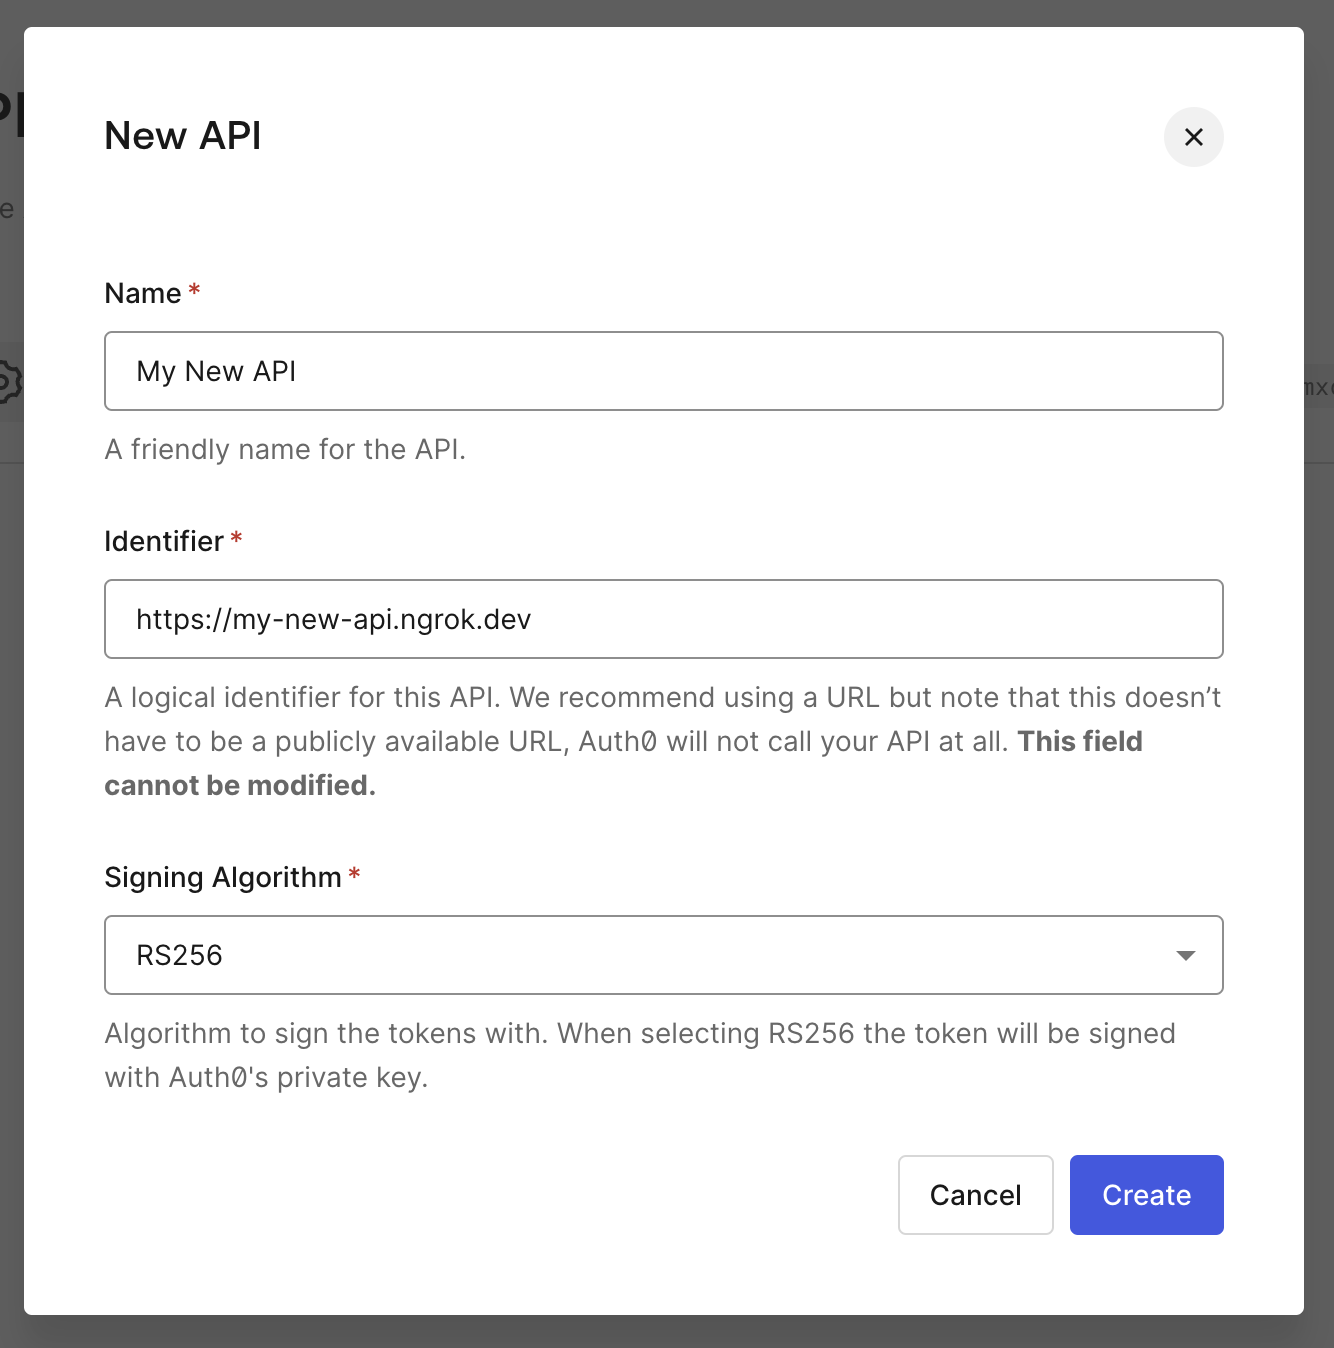
Name your API whatever you'd like, and choose an identifier and signing algorithm. These values will be used later as the audience and algorithm claims.
Once your API is created, you can define and add scopes needed in the Permissions tab. These values will be populated in the scope claim of your JWT.
1. Accessing your JWT
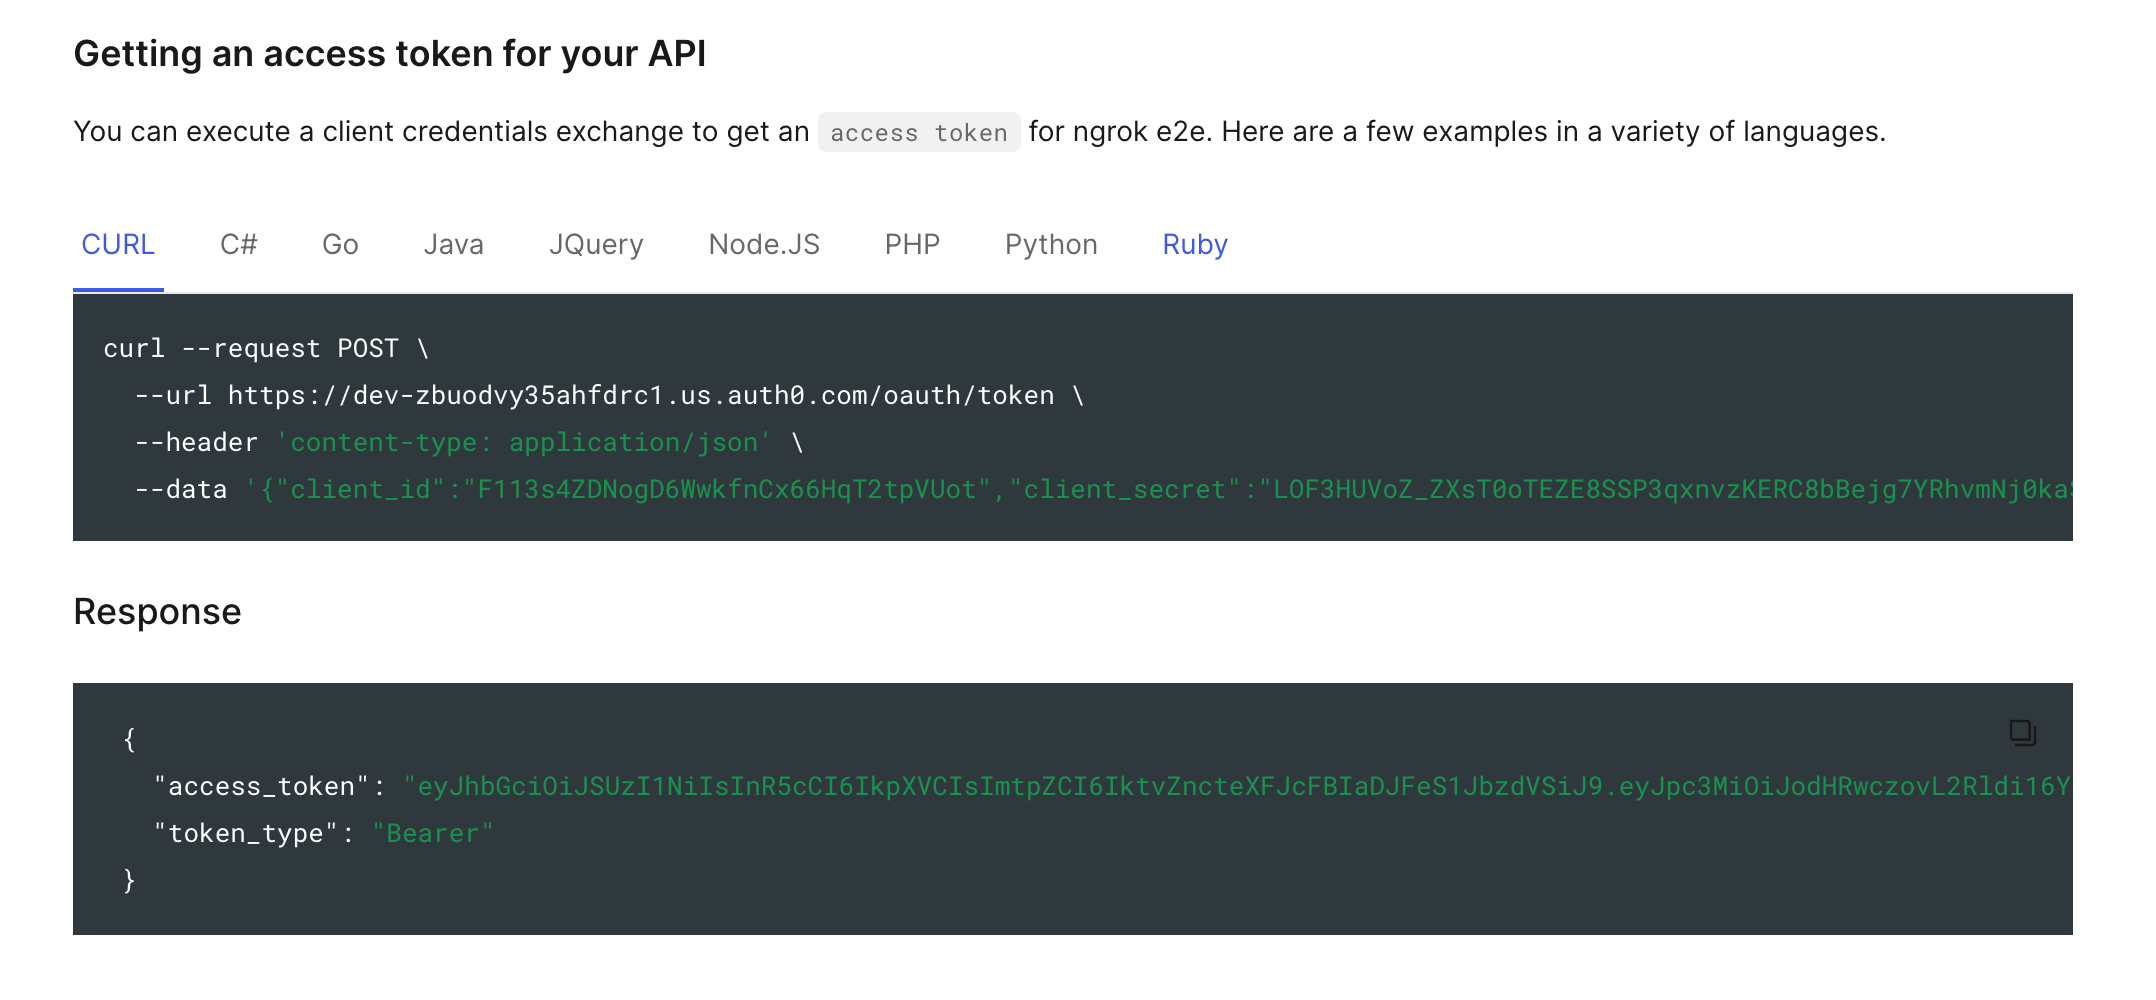
Upon creating your new API, Auth0 will create an associated application under Applications > Applications in the left navigation bar.
Navigate to your application, and click on the Quickstart tab. Here, you will find a signed, fully functional JWT, as well as examples of progromatically generating more in multiple languages.
2. Creating a Machine to Machine application
When you create your API in Auth0, it will automatically create a new Machine to Machine Application and authorize it to use your new API. If you added additional scopes for your API, you will need to manually add them to the new application in the Machine to Machine Applications tab of your new API.
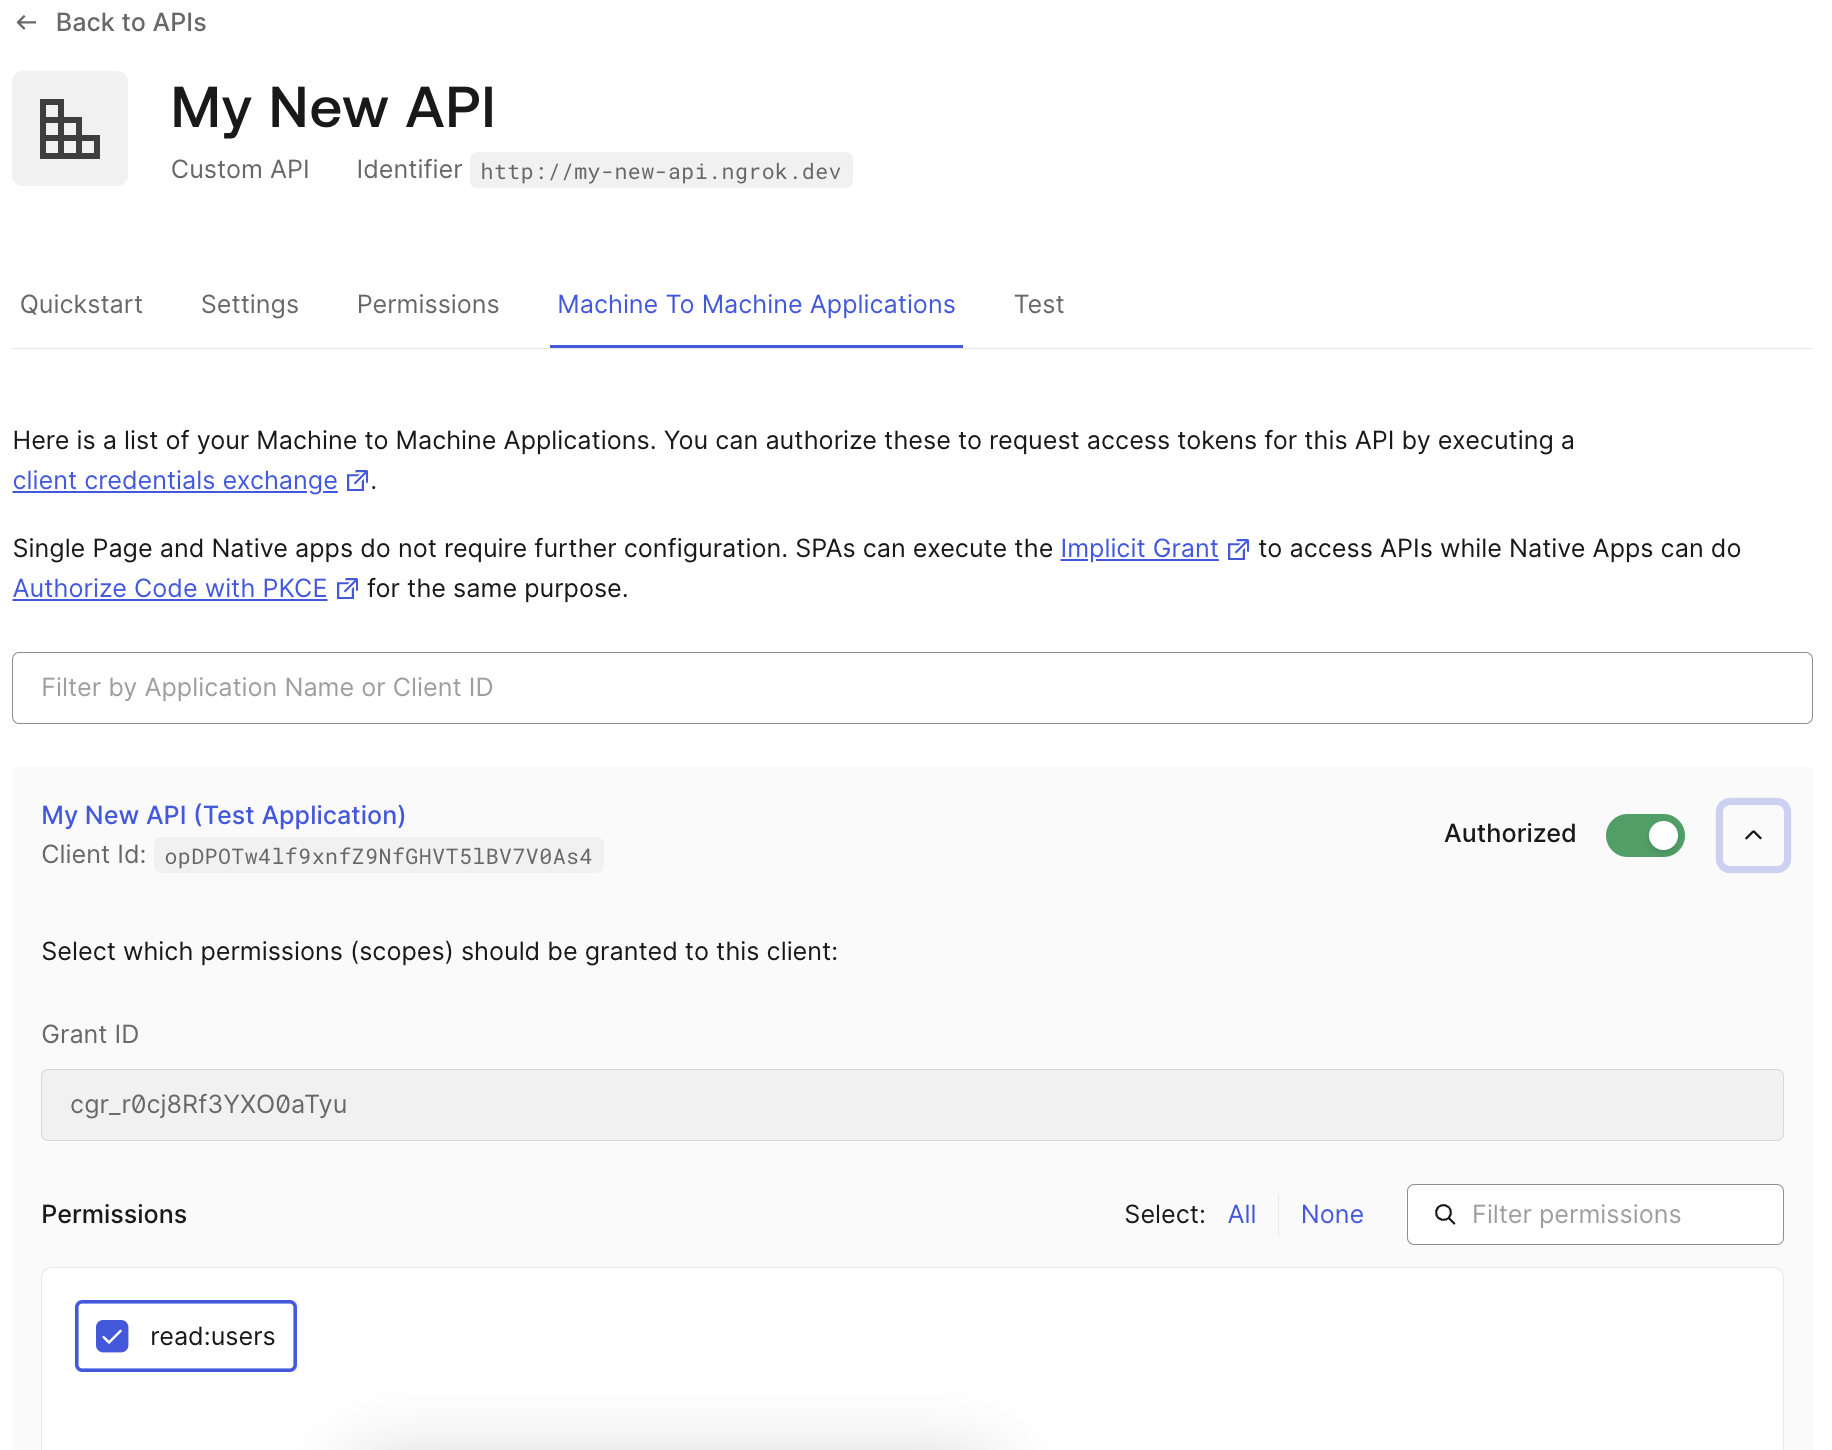
If it did not create one automatically, you can create a new Machine to Machine app and select your new API when prompted.
3. Configuring the ngrok JWT Validation action
You now have everything you need to configure the JWT Validation action inside of ngrok.
In your ngrok Dashboard, select Cloud Edge > Edges and create a new HTTP Edge.
If you already have a domain in your account, you can select it here, otherwise, a new domain will be created for you.
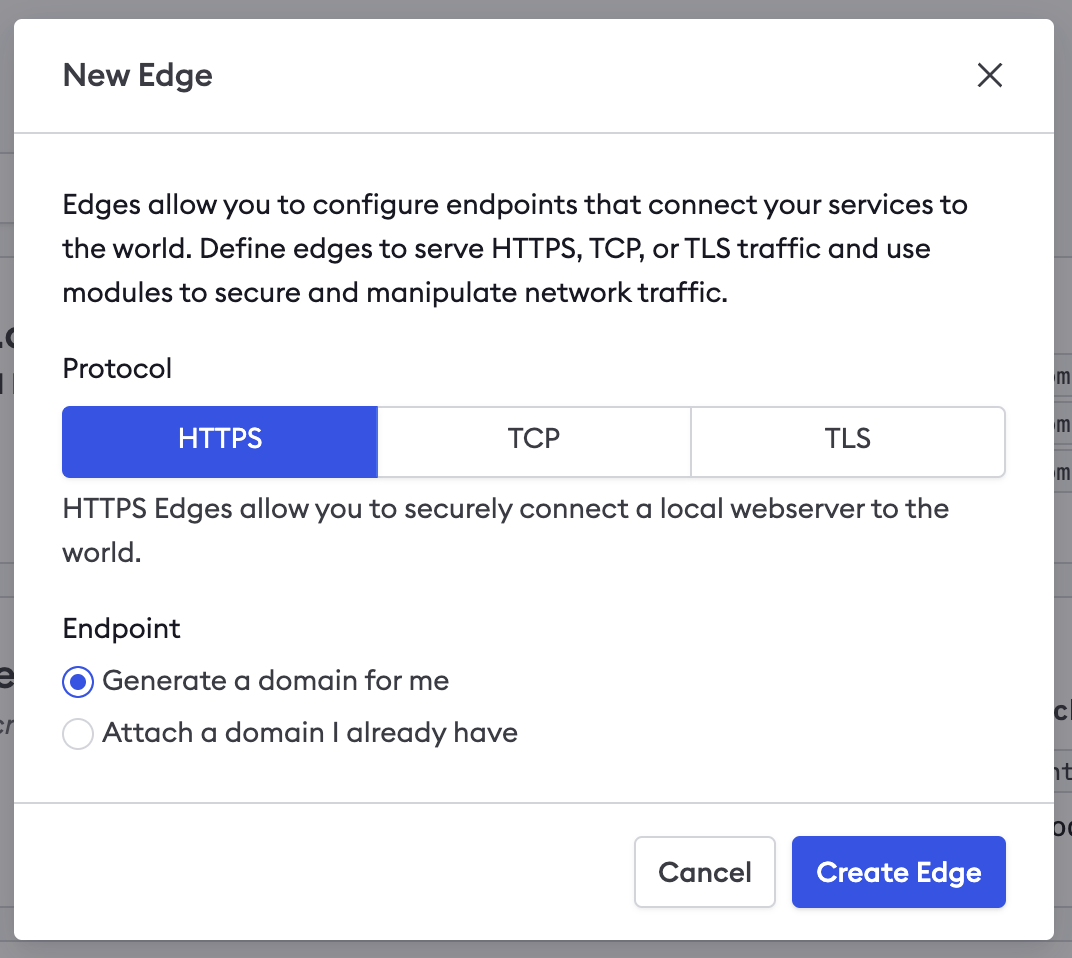
Once your Edge is created, add the Traffic Policy module and Begin Setup.
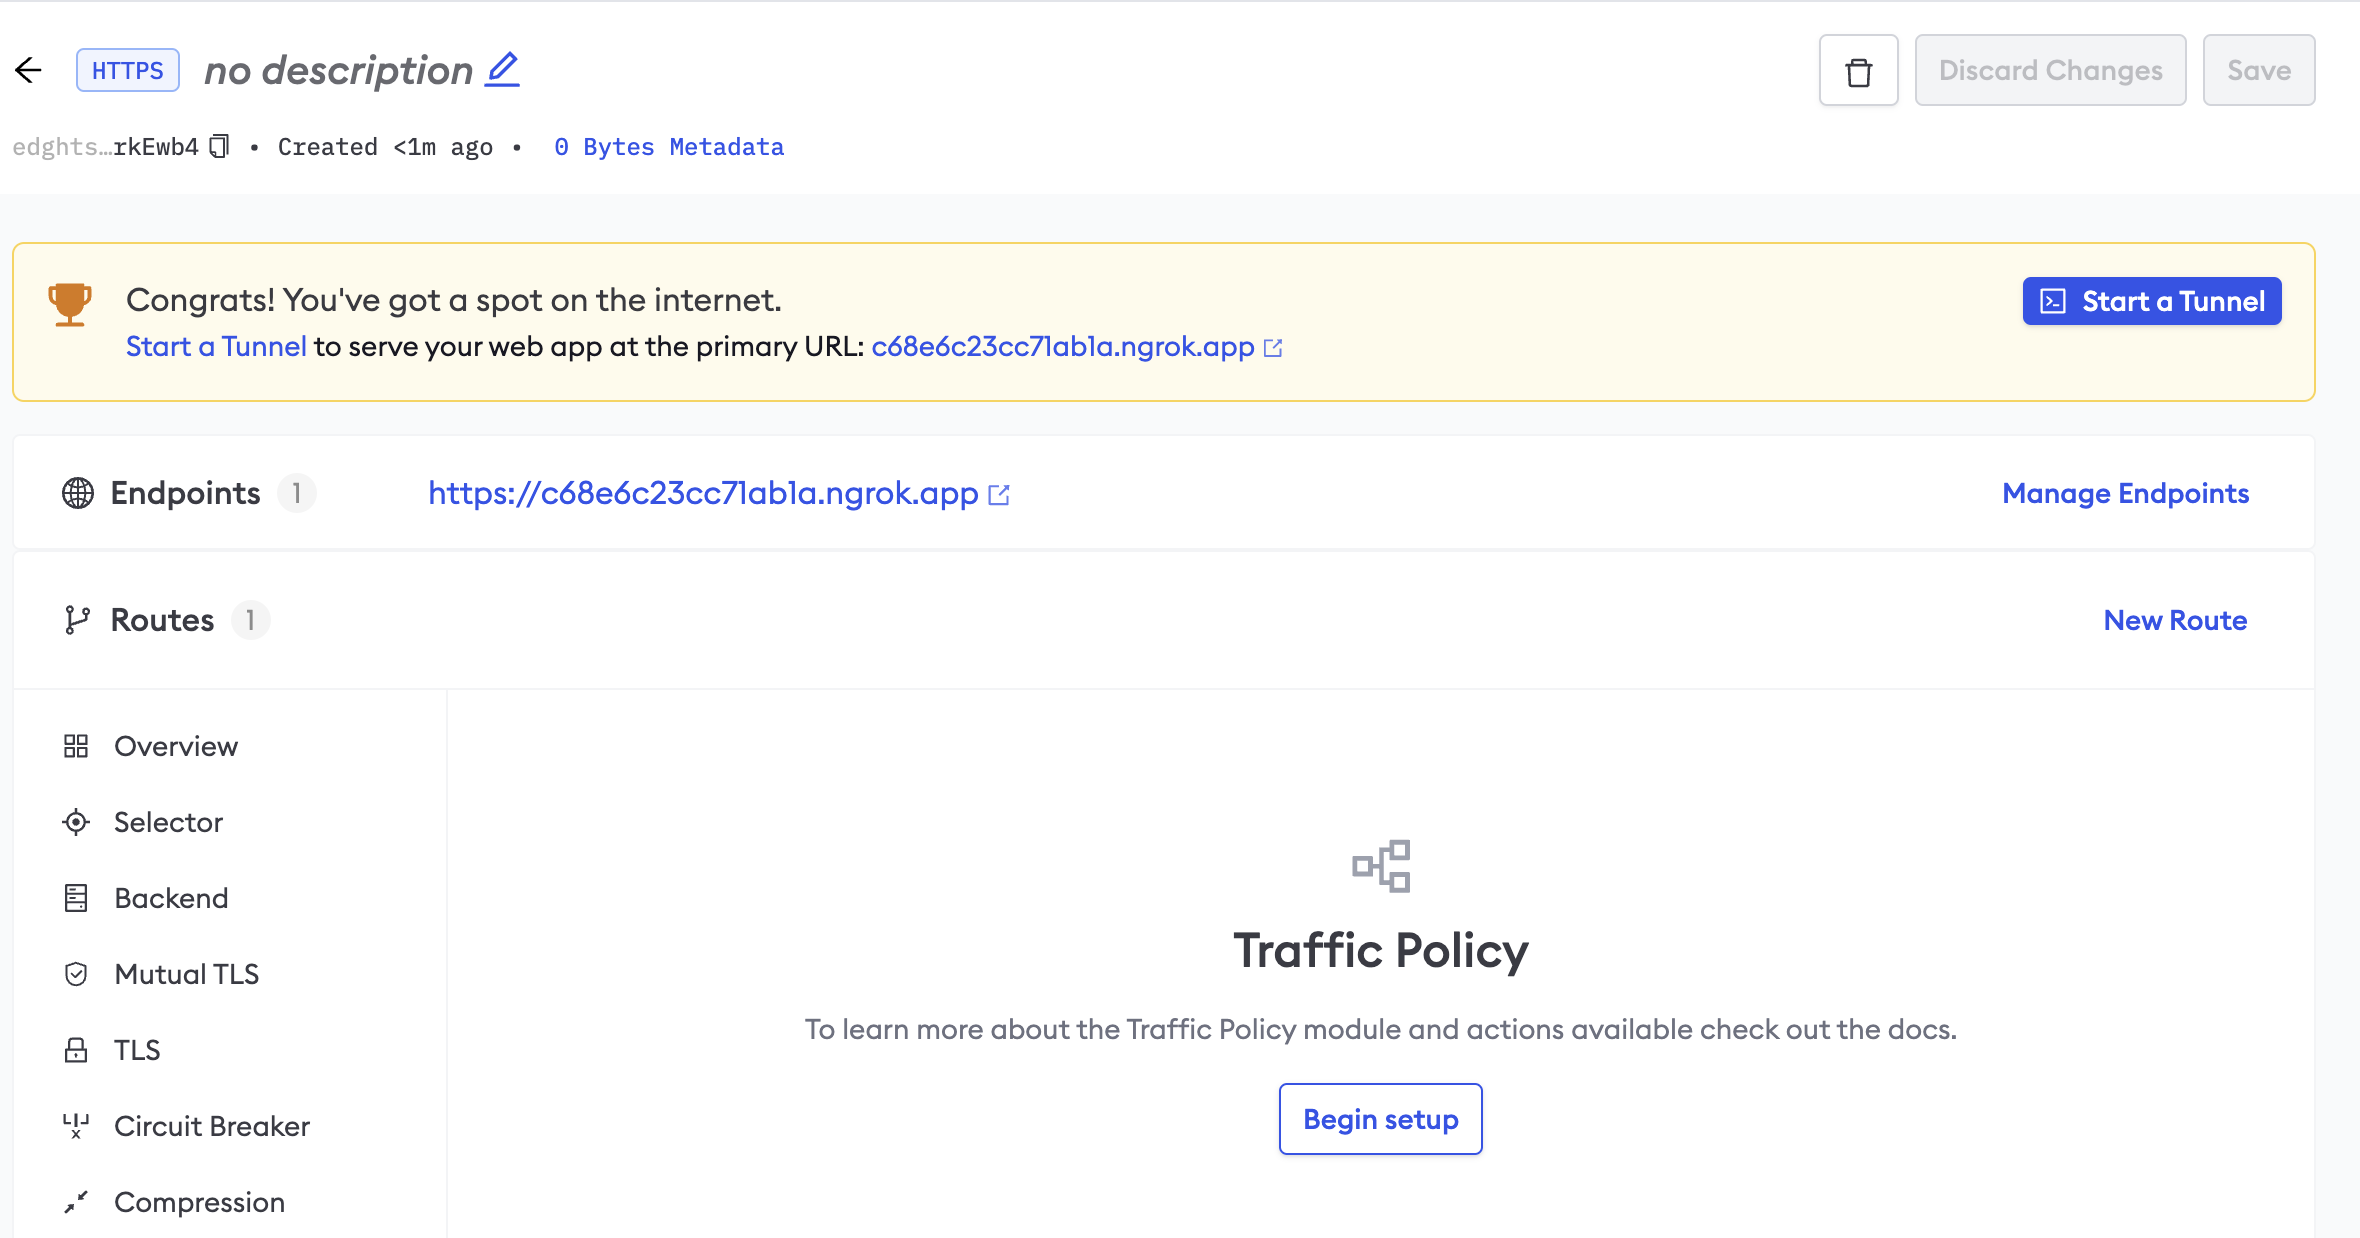
Edit the Traffic Policy, and copy the JSON example from above directly into the ngrok Dashboard. For many of these values, it is easiest to take the example token from the Quickstart tab of your Auth0 Application and decode it using jwt.io. Customize the values as follows:
| Field | Claim | Description |
|---|---|---|
issuer.allow_list.value | iss | The issuer is usually the full URL of the Auth0 application. It can be found in your .well-known/openid-configuration URL, which is usually available at https://{App Domain}/.well-known/openid-configuration. The App Domain can be found in the Settings tab of your Auth0 application. |
audience.allow_list.value | aud | The audience claim is the identifier of your API and can be found in the APIs section of your Auth0 dashboard. |
http.tokens | n/a | This is the location of the token in the incoming request. You do not need to change this value. |
jws.allowed_algorithms | alg | The algorithm your API uses to decode the JWT. You can find this value in Auth0 in your API, on the Settings tab, under Token Settings. |
jws.keys.sources.additional_jkus | n/a | This is the URL to use to verify the JWT signature. It can be found in your .well-known/openid-configuration URL, which is usually available at https://{App Domain}/.well-known/openid-configuration. The App Domain can be found in the Settings tab of your Auth0 application. |
Once you've added these values, you can Save the policy and Save the Edge in ngrok. Once you follow the instructions to Start a Tunnel for your edge, you can test it using curl:
curl --request GET \
  --url http://your-ngrok-domain.ngrok-free.dev/ \
  --header 'authorization: Bearer YOUR-FULL-JWT-HERE-FROM-STEP-1'
If you were able to see the response from your API, everything is working correctly. You can double check by sending a malformed token.
If you get an error with a valid token, go back and double check that your issuer and audience values are correct in your traffic policy.